Category

Slate House

Slate House

4 ways to get the most out of your Slate House candles

March 14, 2021
4 Ways To Get The Most Out Of Your Slate House Candles Blog

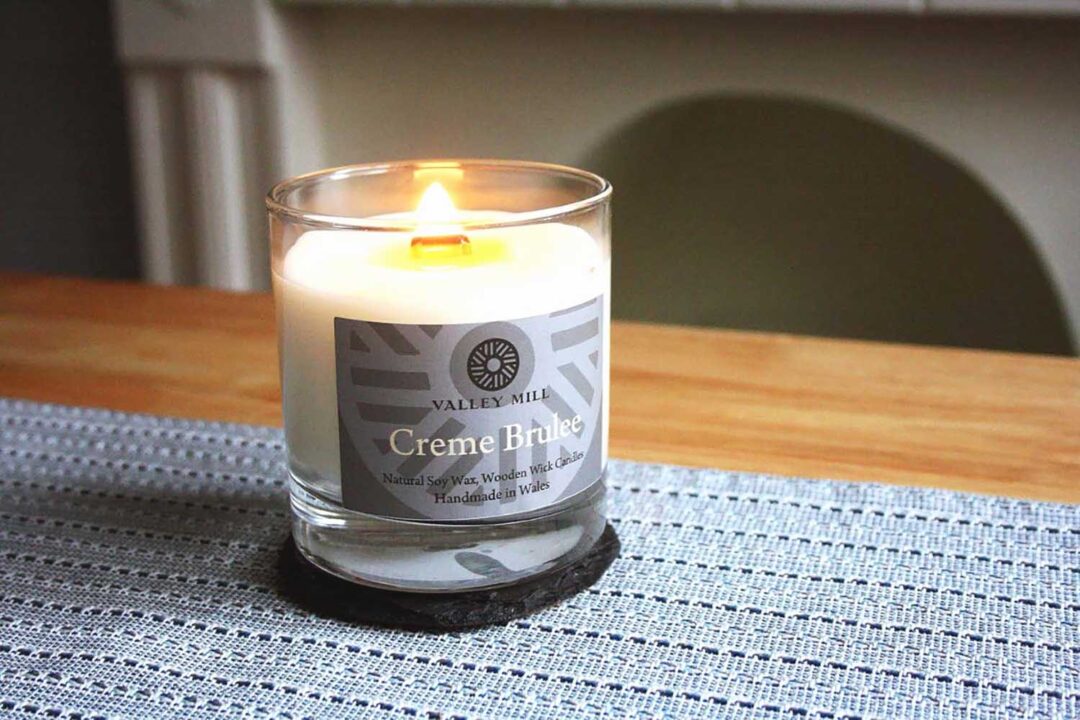
Scented candles are one of our favourite additions to a home, and instantly make a home feel cosy and uplifted. Like many, you may think there is no right or wrong way to burn a candle. However, there are a few common problems that people experience that can easily be fixed with a few simple steps. Here are four of the most common issues we are asked about, and the simple ways you can get the most out of your candle.

How to stop your candles from tunneling?

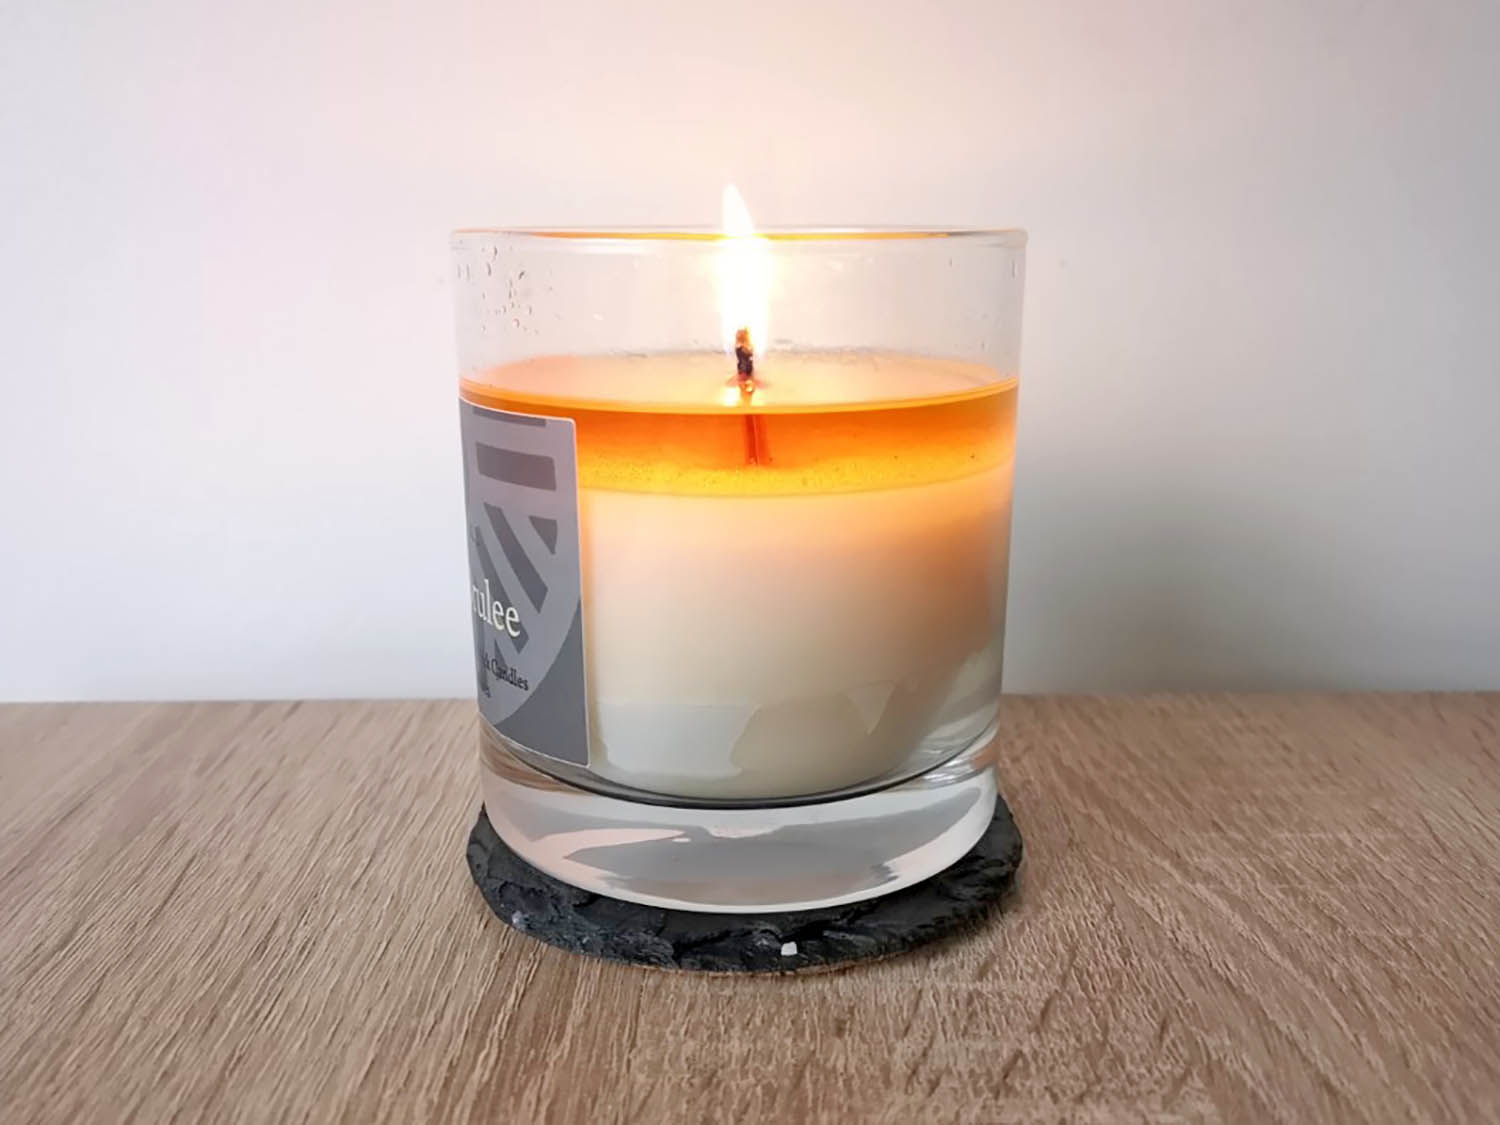
One of the most frustrating problems, when you spend money on a luxury candle, is when the wax ‘tunnels’. Tunneling means only part of the candle melts down the middle and excess wax is left to waste around the outside of the container. And one thing we dislike at Slate House is waste.

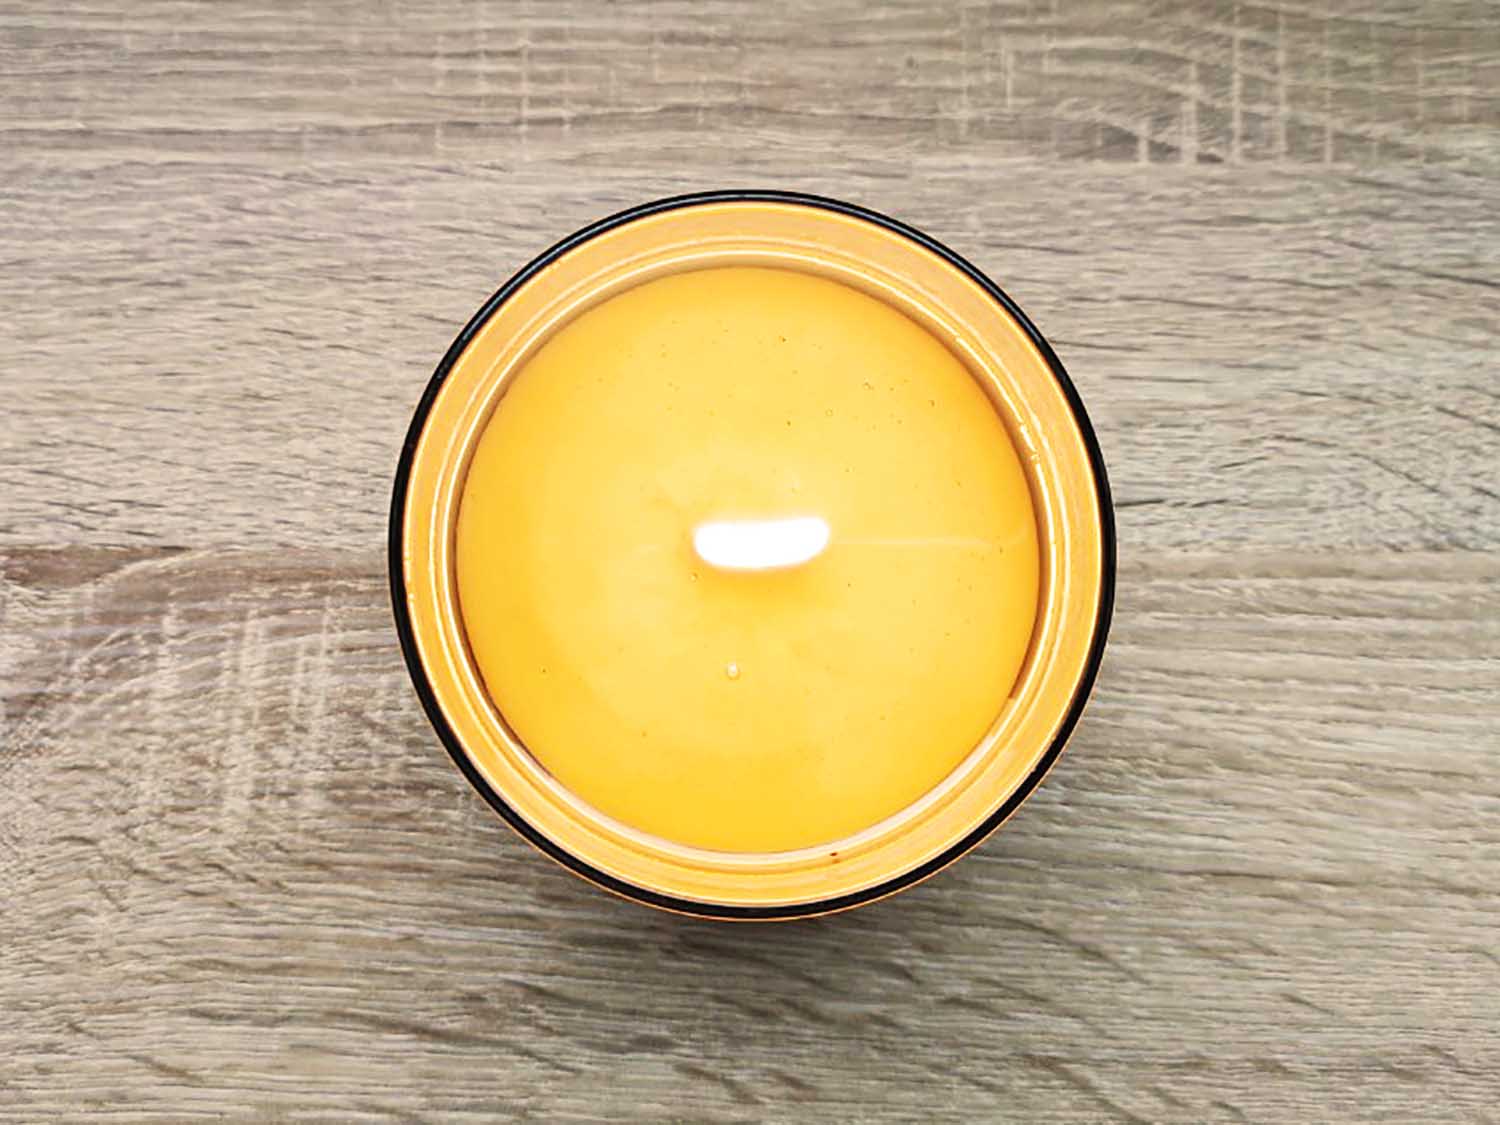
Even though it is a very common problem, there is a very simple fix. When burning a candle, make sure to allow a full melt pool to develop before extinguishing the candle. Allow the wax to melt completely across the surface, to the edge of the container, before blowing it out. It is very important to ensure this, particularly, the first time lighting the candle due to the wax’s ‘memory’. The wax memory means the first time you melt soy wax, it creates a pattern for how it melts during future uses.

The time it takes to achieve a full melt pool varies, depending on the size of candle and the type of wick. For our wood wick candles, we recommend burning the candle for roughly 3 hours before extinguishing it.

A Slate House wood wick candle with a full melt pool

Why won’t the wick relight or stay lit?

One of the most common issues we are asked about is why a wood wick candle won’t relight after the first burn. This can be caused by tunneling, but the most common fix is simply to trim the wick.

Once a wooden wick has been lit and burnt for a few hours, it leaves behind black, charred wood. Like on a normal wood fire, charred wood won’t burn properly due to the lack of oxygen. If you try to relight a wood wick that has not been trimmed, you will likely find that it either does not burn properly at all or will only light for a few seconds before extinguishing itself. Not only will an untrimmed wick struggle to relight, but it may also cause excessive smoke or not melt the wax properly, becoming another cause of tunneling.

The charred section of the wick should be easy to remove; either break off the black wood or use scissors or nail clippers on sections that are harder to trim. It’s also important, however, to make sure not to trim the wick too much. It may become submerged in melted wax and will make the candle even more difficult to light in the future.

This also goes for standard string wicks too. Trim the wick so that it burns properly, reduces excessive smoke, and doesn’t become so long that it falls into the melted wax. However, don’t trim it too much that it becomes submerged in wax and cannot be relit.

How can I maximise the candle scent?

When choosing a scented candle, the key factor is the candle’s scent throw. The scent throw is how well the scent of a candle is released and how far it travels. When choosing any new fragrances, our candles go through rigorous testing; to find the perfect fragrance-wax-wick balance to create the best scent throw. That being said, there are a few things you can do to help maximise the scent throw when burning it at home.

Firstly, consider the size of the space compared to the size of the candle. Larger rooms will need a larger candle, or more of them, to properly fill the room with your chosen scent. It’s also important to consider where the candle is placed in a room. If it is placed close to a window that is regularly opened or a draughty door, this allows the fragrance to escape from the room quicker.

Maximising scent throw is also a reason why you should allow a full melt pool when burning a candle. Allowing the candle to burn for long enough ensures that the wax melts properly and the fragrance oil can evaporate. However, don’t burn it for more than four hours, as you may find the scent becomes less noticeable. Another way to counteract this is to burn different scented candles in different rooms. Your olfactory senses (sense of smell) will notice the different scents as you move through your home so that remain noticeable for longer.

Why is there wax left once the wick has run out?

When using candles, it is advised to discontinue use when roughly 1/2-1/4 inch of wax is left. This reduces the risk of the container overheating and causing damage to the surface beneath.

If you don’t want the remaining wax to go to waste, we have a handy top tip just for you! There are two ways to remove the wax once the candle is finished. Firstly, you can place the candle in your freezer for several hours. This will cause the wax to freeze and shrink, making it easier to remove from its container. The second method is to very carefully pour boiling water into the candle. This will melt the wax, causing it to rise to the surface. Once it has cooled and reset, you will be able to pop the remaining wax out. The wax can then be turned into wax melts, ensuring you get absolutely everything out of your scented candle. Plus, this makes it easier to clean and recycle the container or reuse it for practical or decorative purposes.

So there you have it, our 4 top tips on how to get the most out of your Slate House scented candles. If there any other questions you may have, never hesitate to get in touch via email or social media!

You can see more tips from the experts here Getting Started with Candle Making at Home: Tips from the Experts

Slate House Slate products

How to fit a slate house sign in 6 easy steps

February 14, 2021
How to fit a slate house sign in 6 easy steps?

A Slate House Sign is a stylish and durable addition to your house. We, at Slate House, are one of the biggest providers of high quality slate house signs in the UK. We handcraft all slate products from 500 million years old slate, mined at Blaenau Ffestiniog in Wales.

One of the most common questions we get is how to fit a slate house sign with hidden fixings. Some believe this needs the help of a specialist, but in fact it can be done in a few easy steps.

To help you with the fitting we made a short video to help you fit your new house sign with ease. These instructions are also the same for our Wooden House Signs too.

Included in your box is a fitting kit to your house sign, as well as a set of instructions. This will include the appropriate amount of fitting rods and glue, depending on the size of your sign. You will also need a drill equipped with a 5mm masonry drill bit.

  1. Carefully turn over your house sign.
  2. Fill each drill hole to the top of the supplied superglue, pushing each rod into place as demonstrated, ideally allowing 24 hours, but a minimum of 4 hours, to set fully.
  3. Holding the sign against the desired wall, mark out your drill holes above each rod while pressed to the wall. Take into account that doing this will result in the fitted sign being slightly higher than your initial placement.
  4. Drill 75mm deep into the marks you’ve made on the wall with a 5mm masonry drill bit. We recommend using the spirit level to make sure the sign is level and straight prior to any drilling.
  5. These holes should be filled with superglue before pressing the rods in the rear of the sign into place.
  6. You may wish to wipe over your fitted sign with a wet cloth, ensuring no superglue has been left on the slate.

You now successfully fitted a house sign, congratulations!

How To Fit A Sign With Through Hole Fixings

We now have new range of house signs which have through hole fixings. Our new house signs range include Welsh Slate, Marble, Granite, Limestone, Cast Aluminium, Printed Slate and Cast Brass.

Here is our instructional video to help you correctly fit your new house sign.

Included with your house sign is a fitting and fixing kit and a set of instructions too.
You will receive the appropriate number of dome head screws and wall plugs, depending on the size of your sign.

You will also need a pencil or marker, a spirit level, a flat head screwdriver, a 8mm masonry drill bit and a drill.

  1. Hold your house sign against the wall where you would like it to be fitted.
  2. Use a spirit level to ensure it is straight and level.
  3. Now, mark the wall with a pencil through the holes in the sign.
  4. Carefully drill the holes approximately 30mm deep into the wall using an 8mm drill bit.
  5. Insert the wall plugs in to the holes.
  6. Now simply place your house sign against the wall and screw into place.

How To Design A House Sign

We have created our online design tool to be simple and easy-to-use. This video shows you how simple it is to design your bespoke house sign.

Home Slate House

3 Ideas On How To Cosy Up This Winter

January 17, 2021
3 Ideas On How To Cosy Up This Winter Blog Woollen Scarf

As we welcome in another new year, now is the perfect time to create new routines and refresh your home. Shorter days and colder weather are the perfect combination for cosy days spent close to home, especially when we are unable to visit family and friends. 

Here are 3 ideas on how to cosy up this winter; to make your home warm and inviting, and make the most of the places around it. 

Continue Reading
Slate House

Happy New Year 2021!

January 3, 2021

Everyone at Slate House wishes you all the best for 2021, and we hope the new year brings you joy, health and prosperity!

Last year was a complete rollercoaster for everybody, and our lives really have been turned upside down. Nevertheless, we trust that 2021 will be a more positive year.

As with many other online businesses, our website has grown from strength to strength; with orders going through the roof. Lots of things have changed within the company for us to manage our busiest year to date, including overhauling our processes and hiring more people. Our small team of 10 has already grown to a team of 16, with other team members joining over the coming months!

That’s only the start of our exciting plans for 2021! To work more effectively as Slate House continues to expand, we will be moving our Neath offices and Crynant workshop to brand new premises in Swansea. This will be a huge move for us and, for the first time ever, the majority of the Slate House team will be based in one place.

As always, our main goal for the new year is to continue to help you on your search for quality, handmade products, and to personalise them to your wish. To help this, lots of improvements will be made to our website; including a new and much improved personalisation facility. Our current design tool is already one of the best in the UK, but the new one will be world class, and will offer you almost limitless design possibilities.

We will also be introducing new, easier ways to pay, as well at the option to pay in instalments; so you can buy without being worried of the immediate costs.

To be able to introduce more people to the luxury, handmade products we offer, we will start selling through alternative online marketplaces. The first one will be OnBuy, the UK-based online marketplace, with other platforms to follow.

Lastly, we will be bringing you even more offerings from local Welsh businesses, as well as expanding our range to more products from across the UK, without comprising on quality. You’ll have even more reason to come back to our website for every occasion!

We really are excited for what 2021 will bring, and hope it is a much more positive time for you all too! Stay safe everyone!